Keep your family history discoveries in the organised manner they deserve is a vital part of being a family historian – you’ve worked hard to find them! In this in-depth guide we share our advice on how to help you create tip-top files, well-preserved heirlooms and beautiful display charts, how to organise both digital and paper records, and provide a quick FAQ on organising your research.
If your research notes are scattered across post-its, your digital downloads are buried in cryptically named folders, and your ancestors are starting to feel like a rowdy bunch, you’re probably suffering from a common genealogical ailment: information overload – and it’s time to get organised.
Quick Links
How can you keep your family history research organised?
It doesn’t take long before the details you’re gathering soon mount up, does it? To keep track of all the fascinating information you’re accruing, you need to set up a system to help you keep organised.
These are the four key elements that your system will need to include:
- A filing system for paper records (these will include such things as inherited family papers, certificates, newspaper clippings). This system could include certificate folders (ring binders with pockets), for instance.
- An archiving system for looking after heirloom photos and artefacts. This could include archive quality storage boxes, packaging and albums, to best preserve the items.
- A digital filing system for logically storing all the digital documents that you will download from the web (eg census documents etc). For this you can set up folders and a file naming system on your computer. It’s always best not to overcomplicate things, so you may initially just wish to create one folder called, eg, ‘My family history’.
Every document you add to the folder can then be given a name to help it be easy to find: perhaps have the surname first, then first name, a date, an indication of the document type. Eg EASTWOOD_Susan_1891_birth_certificate.
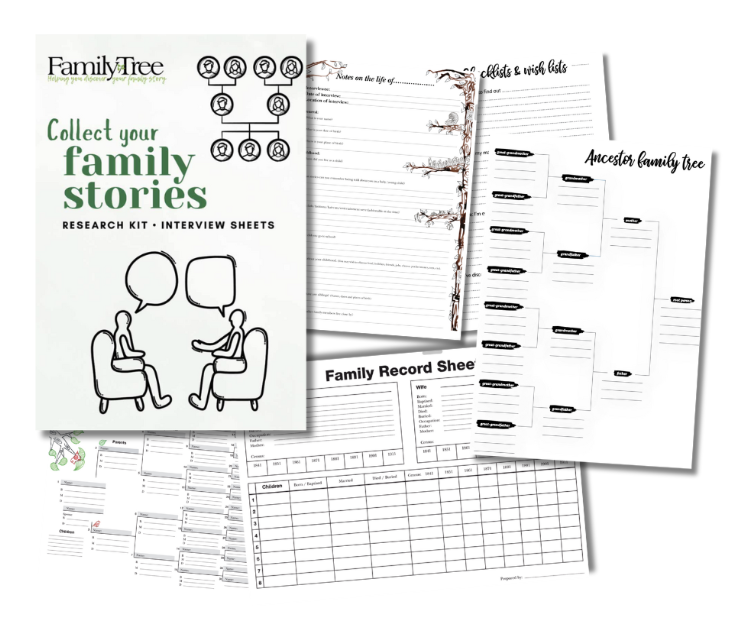
- A research recording system This could be family history software capable of keeping notes and creating a family tree chart; or it could be a paper notebook, ring binder and printed family tree. You may wish to use both – paper and digital resources.
Why are these 4 points important?
Points 1 and 2, above, will help you look after and grow a family history archive of ancestor material for preserving for future generations.
Points 3 and 4 will help you keep track of your research – making a note of what you’ve discovered, why you’ve deduced what you have, and most importantly recording who is related to who and how.
Quick link: how to set up a family history research log
/em>
How to organise paper and digital resources
You may wish to use both – paper and digital resources, of course. The main thing, however, is that you create a system that suits the way you work. Starting with the most simple system possible will make you more likely to use it, and you can always fine-tune it as you go along.
Creating a home archive
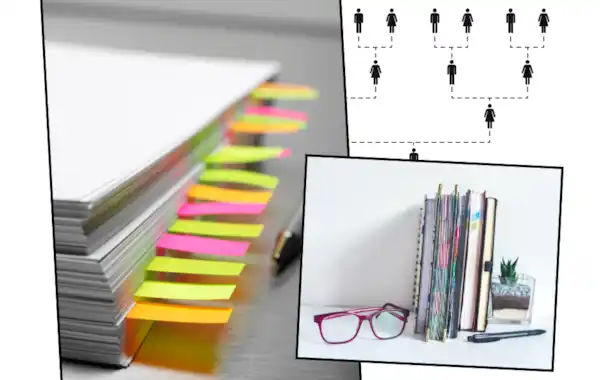
The old-school paper way is to get a ring binder, with four dividers, one for each grandparent’s line.
To find out more, search online for the ‘Mary Hill Colour Coding System’ and you will find numerous guides and blogs by fans of the system.
What might your home archive contain? This will depend vastly on what has been passed down from previous generations, who has inherited it, and whether you are in touch with them, and are able to ask for a copy.
If you are fortunate, your home archive could, potentially, contain:
- Old photos
- Letters
- Newspaper clippings
- School reports
- Certificates
- Scrapbooks
- Recipe books
- Medals
- Deeds
- Inventories
- Samplers
- Items of clothing
- Memorabilia: items from sporting achievements, or holidays, for instance.
Clearly some of these two-dimensional items are easily stored in folders, in archive quality wallets. Other larger and bulkier items would need their own storage box. And some items you may like to have on display.
How best to store family items
You may wish to have a selection of your family items on show for you, and others, to enjoy. This is of course a lovely idea. To ensure they can be enjoyed for as many generations into the future as possible, be sure to keep items out of direct sunlight, which can have a bleaching and deteriorating effect.
If storing, choose a dry location that has a stable temperature: ideally in one of the rooms you use regularly in your home (not in an attic, basement or garage). If possible use archive quality storage products that will slow the deterioration of your photos and papers. They can be expensive, so you could gradually buy such storage items over time.
How to organise your memorabilia & heirlooms
Memorabilia and heirlooms are the sorts of items that may well interest the other members of the family a little more than the letters and photos, so it could be that other relations are the custodians of some of the family memorabilia and heirlooms.
Conversely if such items are in your possession you may wish to offer such items to your family members, as it may be difficult for you to find the space for everything.
Save the stories
As the family’s family historian you will understand that the value of the items as regards your ancestors’ lives is in the stories that go with the items – as that’s what makes them precious to your family history.
So find a way to record these stories:
- You could simply type the story up and add it as a file to your family history software, or on a sheet of paper, filed with the relevant ancestor in your ring-binder.
- If the owner of the memorabilia or heirloom agrees you could take a photograph of the item and add that to your family history records.
- You could interview the person who heard the story about the item first-hand from the ancestor, and save it as an audio or video clip.
The importance of the stories can’t be underestimated for what they add to your family history, and for how much more precious they make the item itself.
For instance, without the story, the item may just look like ‘an old ship in a bottle’; with the story, however, you will know that it was given to your mother, aged 6, by her father when he returned from serving in the Atlantic during the Second World War, and it was the first present he’d been able to give her for three years. (You get the idea, the story that goes with that old item really makes it special!).
Catalogue your collection
At its simplest cataloguing your collection means: create a list of all the items in your family history collection. So what should you include on the list?
- A description of the item.
- Where is came from (original owner, previous owners(s).
- Where it is now stored (where in your home, or with which other relation).
- Whether you have a photo of the item (you could include this on your list, inserting the photo into a Word document or Excel sheet for instance).
- The story that goes with the item (or a link to a blog of the story).
Creating a home library
This sounds very grand doesn’t it! There is something about ‘family history’ and ‘books’ that make them perfect partners, so you may find yourself getting quite a little collection of tomes over the years. Most of these are likely to be new publications, but you may wish to add vintage volumes to your home library.
For instance, perhaps there is a trade publication that mentioned your ancestor, or maybe you just love the look of a Victorian edition of Mrs Beeton’s cookery book.
Old, or new, paper-based or digital (e-books), we recommend that you write a list of all your family history books, and place it in the cloud or save it as a file on your mobile phone. Then, when you are out and about, and find a book of interest, you can quickly check whether you have it already!
Organising your digital records
There are billions of historic records that have been digitised and made available online. Some of these will be related to your ancestors.
Before you know it, you can have a mass of documents saved to your computer… but, unless you decide to be organised, you can have little idea what each file is, without opening and studying it. Worse still you may have found a document, and can’t remember where you’ve saved it on your computer. How frustrating would that be!?
To prevent yourself getting in this pickle, we have a set of steps, to help you keep your digital files organised right from the start. They provide a simple arrangement that you can expand as your research continues over the years.
Arranging your digital family history folders
Step 1: set up a folder on your computer called MY FAMILY HISTORY.
Step 2: Within your MY FAMILY HISTORY folder you are going to create several further folders:
- DOCUMENTS
- PHOTOS
- AUDIO & VIDEOS
Step 3: Within each of the folders above (i.e. DOCUMENTS, PHOTOS, AUDIO & VIDEOS) you are going to create a further folder called POSSIBLES.
It is in the POSSIBLES folders that you can file everything you are uncertain of – then you have your puzzles and possibles clearly stored, and know that you need to investigate them further.
Thoughts on your folder hierarchy
Some people may like to create a folder for each grandparental branch of the family tree. If you wish to do so at this stage, that’s fine.
We would recommend that you use the same system across all your DOCUMENTS, PHOTOS, AUDIO & VIDEOS folders (i.e have a ‘SMITH’ folder in documents, in photos and in audio & videos).
You can name each grandparent folder by the full name or simply the surname of that grandparent.
At this stage, however, we are not going to implement these sub-folders for each grandparental branch.
Your computer provides you with extensive sort and search capabilities, so we feel it is simpler to keep all your documents in a single folder called DOCUMENTS, and all the photos in PHOTOS etc.
However as time goes on you will very likely wish to set up folders for specific family history projects and pieces of research you are working on.
Naming your family history files
Now we’re going to look at how to name your family history files. To follow are recommendations that will help you see at a glance who each file relates to, what each file is about, and where you found the information. This is how we recommend naming your family history files.
You may either name your file by record type or by surname primarily. For instance:
Record type. SURNAME, first name. Date. Place. Website code/Collection.
or
SURNAME, first name. Date. Place. Record type. Website code/Collection.
Here are a few examples.
First let’s look at how you might name a file containing a copy of a page from the census:
• By record type:
Census 1871 Southampton EASTWOOD James Ancestry
• And by surname:
EASTWOOD James 1871 Southampton Census Ancestry
Next, let’s look at how you might name a file containing a copy of a family photograph:
• By record type:
Photo Collection George Hill EASTWOOD James 1897 Brighton
• And by surname:
EASTWOOD James 1897 Brighton Photo Collection George Hill
These are simple file naming systems that have the following advantages:
- Your computer will be able to sort them into name, then date order.
- You will be able to see at a glance what sort of item it is without opening the file.
- You will be able to see where you found the record online, or who holds the original (in the case of a family photo for instance, where we have included ‘Photo collection George Hill’ in the file name).
A further point to consider
The system isn’t perfect however, and does have some disadvantages. Such is the nature of family history filing systems. Let’s reconsider that census file name above:
EASTWOOD James 1871 Southampton Census Ancestry
It is highly likely that there are other people named on the census page that belong in your family tree. Perhaps James Eastwood’s wife and children, say. However it would make the file name unmanageably long if you were to include all their names. So, you will need to compromise.
Some tips to keep your digital records organised
Be consistent! As with paper-based filing systems the main thing is to set up a system that you employ consistently across your family history files.
By always using the name of the head of the household for your census files, for instance, you will know that that is what you have done, and hence under whose name to look for the relevant document.
Tag family members: In addition, by adding the copies of the documents to your online family tree and/or your family history software on your computer, you will be able to tag the other relations that appear, for instance on the census page, or in the old group family photo, etc.
It’s never too soon to start getting organised! The way in which you arrange your digital family history files is entirely up to you. If you’re an organised sort of person and already have a filing system for your digital files, that is good news, as we cannot encourage you enough to keep your family history files organised from the start.
You will also find that whatever system you choose, you will evolve it – or even overhaul it completely – as time goes by. But, in the meantime, do get into the habit of naming your files clearly so that you can readily find them when you need them.
Additional digital options
Many of the major data websites (Ancestry, FamilySearch, Findmypast, TheGenealogist (via TreeView) and MyHeritage) provide online family tree builders, to which you can add your information.
Quick link: Which family history websites do I need? And do I need to pay?
Plus there are additional standalone online family tree builders, such as Famberry, TribalPages, WikiTree and WeAre.xyz.
There are also many family history programs that can help you create orderly, flexible research – growing a digital archive of your family history that you are in charge of.
Quick link: Read more about family history software in our in-depth guide
Getting your research organised - FAQ
Q: I’d like to get a large paper family tree to display on my wall, what can you recommend?
A: There are several options and things to consider.
Will your family tree chart be a working document, to which you’ll continue to add details as you find them?
If so think about poster-style charts such as those from Family Chart Masters or MyHistory for you to fill in by hand.
Or is your chart the result of your research? In this case you could have it professionally printed, by, for instance, Genealogy Printers, Family Chart Masters or MyHistory.
Q: I love using my mobile for family history, can you recommend any good apps?
A: Popular apps for family historians include:
- Evernote – to help you keep your research note-taking organised
- Ancestry, Findmypast, MyHeritage, TreeView and FamilySearch – for growing your online family tree
- BillionGraves – for adding and sharing photos of gravestones
Don’t forget the generic apps on your phone too: such as the voice recorder, spreadsheets, notes, reminders etc.
Q: How should I organise my family history photographs?
A: Sorting and organising your family photos, both digital and physical, makes them much easier to find, share and enjoy. Photographs can be organised by size, format, family, Ahnentafel number, generation, event, or theme. Read more in our guide to organising photographs.
Q: How can I organise and share my family history?
A: Recent years have seen some exciting innovations in family history, encouraging the family’s family historian to share and collaborate on their research with family members. Three very interesting pioneering websites to this end are:
Storied.com - this allows you to write family stories and add photographs. It does have some record collections you may search for information too. (No charge, but with additional functionality available to paying subscribers).
WeAre.xyz - this allows you to build a family history website, blog and family tree. (30-day free trial).
MyStories.com - this service from MyHeritage allows you to sign up for a year (US$99), during which each week you will be emailed a prompt to write a family memory. At the year’s end this will be published as a printed keepsake book for you.
If you’re brand new to family history, start with our beginner’s guide to building your tree.
And don't forget to sign up to the Family Tree newsletter for more guides.


